Courses are a fundamental part of Breeio. Courses are assigned to users and tracked in the reports.
To create a course, go to the Content area, click on the Courses tab, and select New course.
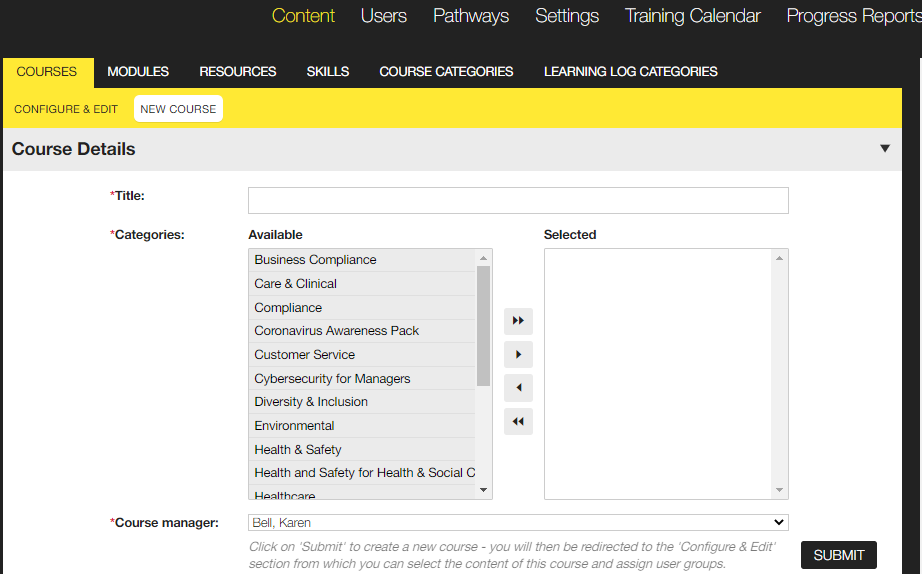
1. Enter the course details
2. Click on Submit
3. Complete the rest of the course details
| Title |
You can make changes to the course title. |
||||||||
| Image |
Associate an image with your course. This will appear on the course tile and in the banner at the top of the course page. You can upload your own image or browse the royalty-free images on Breeio. |
||||||||
| Description |
Learners will see the short description when they go to the course page. |
||||||||
| Reminder message |
This text is included in e-mail messages sent to learners, e.g. "You will not be able to end your probation period until you have completed this course". |
||||||||
| Completion statement |
This text will appear on the course certificate and in the learner's training record. It is ideal for messages such as "Approved by the Law Society for 2.5 CPD credits". |
||||||||
| Syllabus and pre-requisites |
This text will be displayed when learners decide to add an optional course. It should help the learner decide if the course is appropriate for them. |
||||||||
| Aware score |
This is only available if your organisation has this feature switched on. The default for all courses is '1'. If you want some courses to count for more on the leaderboard you can increase the award score here. |
||||||||
| Skills |
This is only available if your organisation has this feature switched on. You can associate your course with one or more skills and levels. Completing the course will give the learner that skill and level for the validity of the course. For example, if the course must be renewed every 12 months, the skill will only be 'valid' for 12 months. |
||||||||
| Issue certificate |
Tick this box if you want to issue a certificate for the learner to print at the end of the course. |
||||||||
| Automatically email certificates |
Tick this box if you want learners to receive an email with their certificate when they complete the course. The certificate will still be available to the learner on the course page when the course has been completed. |
||||||||
| Send assignment email |
When this box is ticked, each learner will receive an e-mail when they are assigned this course. |
||||||||
| Categories |
The course will be displayed within this category in the Catalogue area. |
||||||||
| Target dates and renewals |
Also indicate any e-mail notifications that should be sent as the target date approaches. When selecting the content you can create a repeat pattern to present different modules at renewal time, if the 'Repeat pattern' feature has been switched on. If a new joiner has a start date in the future their target dates will be aligned to their start date. |
||||||||
| Auto suspend date |
Automatically suspends a course on this date. This might be useful if you have used a Fixed Target Date and you do not want new joiners to be assigned the course after this date. Suspending the course will stop it from being assigned to new people and will remove un-started assignments. It will retain in-progress assignments and completions, and the ability to look at the module content. |
||||||||
| Effective date |
Enter a date to apply the assignment rules to users with a date joined:
The effective date will only apply to mandatory assignments not optional assignments. |
||||||||
| Course manager |
The name of the administrator who originally set up the course. |
||||||||
| Status |
Under construction - learners cannot see the course and completed assignments cannot view the content. Live - assignments will be made according to assignment rules and the course is fully available. Suspended- suspending the course will stop it from being assigned to new learners even if assignment rules are in place and will remove un-started assignments. Learners who are in progress on this course assignment will be able to continue. Those who have completed will have the ability to look at the module content. The course will still show in reports and the Learning Log, etc. |
4. Click Update.
The structure of the course has been created, ready for the content to be added.
See also...